Estimated reading time: 10 minutes
A tiny glass garden, aka terrarium, that practically waters itself sounds like something from a fairy tale. The reality is even better: once you get the setup right, a DIY terrarium genuinely requires almost no attention.
The problem? Most beginners Google “how to make a terrarium”, run into terms like bioactive substrate, false bottom, or drainage matrix, and immediately feel overwhelmed. That confusion is common, and easy avoidable.
Once you understand the logic, how moisture behaves inside a glass container, which plants actually thrive in this environment, why pebbles are required at the bottom etc., terrarium setup for beginners becomes much simpler than it looks
This guide covers everything you need to build your first DIY terrarium successfully.
Table of contents
- 1. Closed or open: which type actually suits you
- 2. Terrarium Layers Explained: How to Build the Right Base
- 3. Best Terrarium Plants
- 4. Building your first DIY terrarium step by step
- 5. Lighting and humidity: what most beginners get wrong
- 6. Common Terrarium Problems and How to Fix Them
- 7. Final Thoughts: Start Small and Build Your First Terrarium This Weekend
And if you’re already into aquascaping or planted tanks, there’s a useful overlap here. Many of the best terrarium supplies—like activated charcoal, moss, decorative pebbles, and hardscape wood—are the same materials used in planted aquarium setups. That’s one reason why Aquariums India has quietly become a practical source for beginner terrarium builders too.
1. Closed or open: which type actually suits you
The first decision you’ll make is whether your ecosystem will be sealed or exposed. This isn’t just about aesthetics; it determines which plants will survive.
What a closed terrarium does differently?
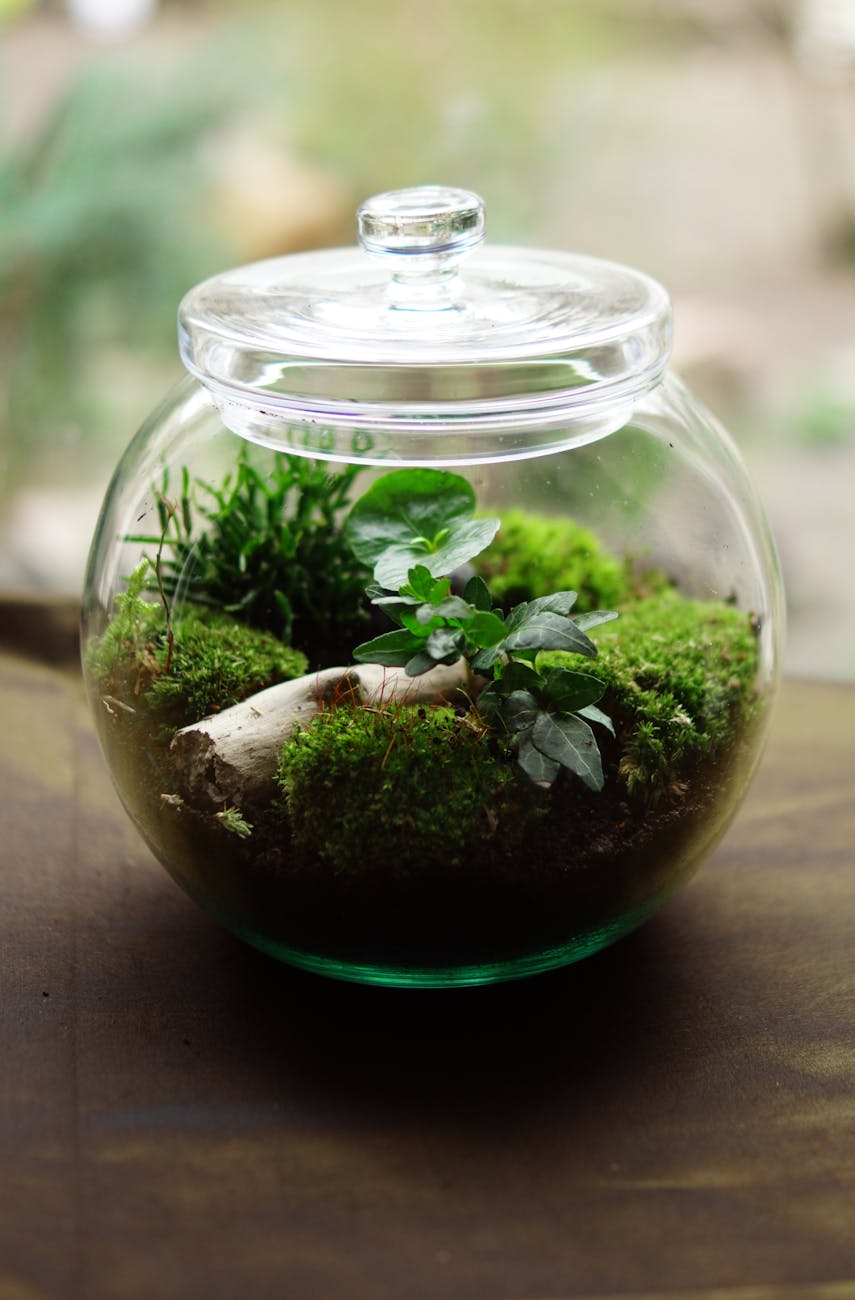
A closed setup traps moisture, creating a miniature water cycle. Condensation on the glass drips back into the soil, meaning you water it once during the build and then barely touch it again for weeks. High humidity stays locked in, which is exactly what tropical plants and mosses need to thrive.
The tradeoff is that you need to keep an eye out for mold, and direct sunlight can overheat the glass fast.
When an open terrarium makes more sense?
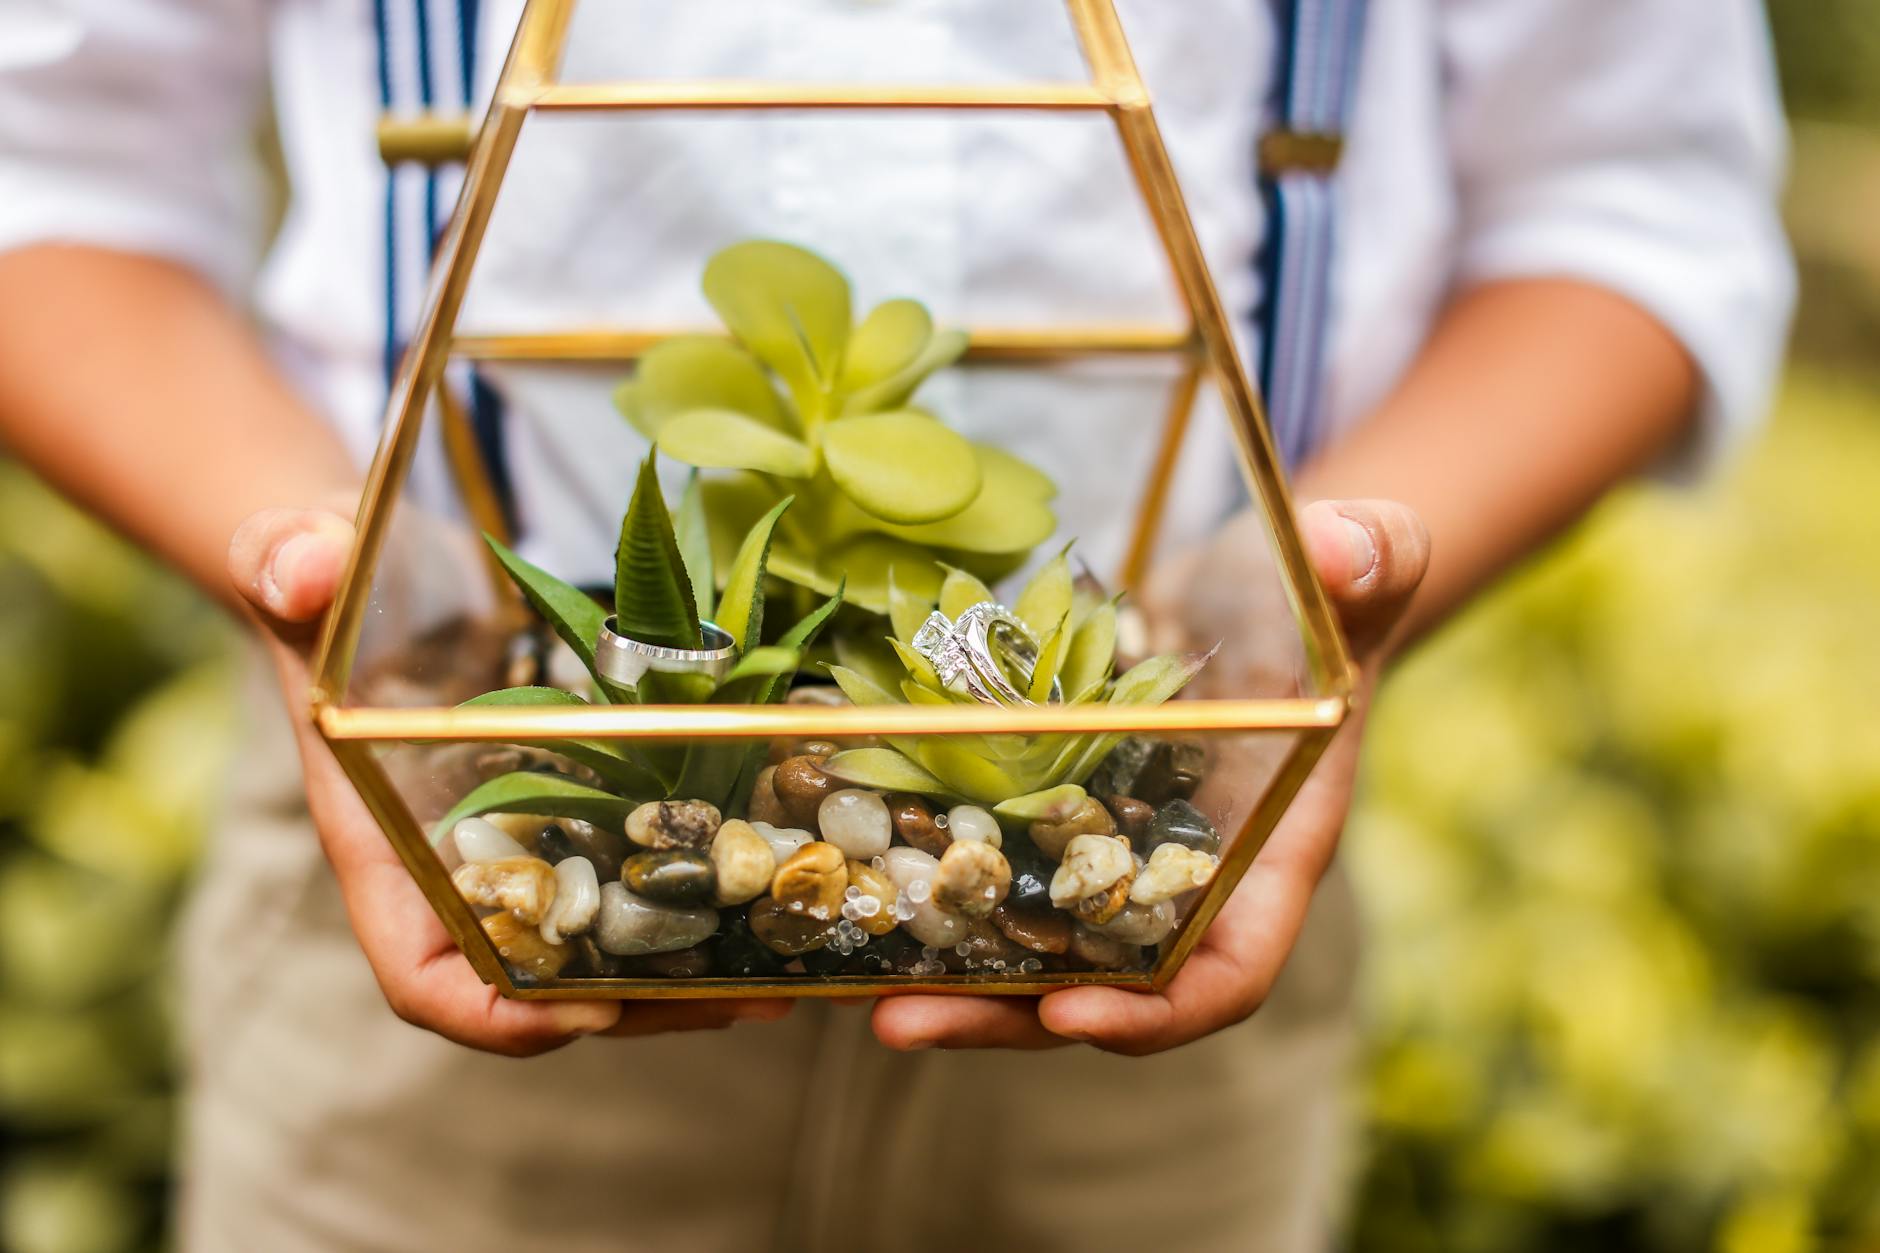
An open terrarium has no lid, so it breathes freely and dries out faster. That’s not a flaw, it’s a feature for succulent terrarium plants, cacti, and air plants that genuinely need. Open setups also give you easier access for trimming, rearranging, and general plant care. The overall look tends to be cleaner, drier, and more sculptural, which makes them popular for desk / table décor and modern indoor plant displays.
A simple way to decide:
- If you want a lush, low-maintenance tropical terrarium, go closed
- If you prefer a drier, architectural setup with succulents or cacti, go open
| Feature | Closed Terrarium | Open Terrarium |
| Environment | High humidity, recycled moisture | Low humidity, high airflow |
| Maintenance | Minimal (water once every few weeks/months) | Occasional (water every few days) |
| Best Plants | Tropicals, Moss, Ferns | Succulents, Cacti, Air Plants |
| Light | Bright, indirect (no direct sun) | Bright, direct or indirect |
Both styles work well. The key is matching the setup to the plants—not forcing the plants into the wrong environment.
2. Terrarium Layers Explained: How to Build the Right Base
The four layers and why each one exists
This is where most beginners go wrong. Skipping layers leads to smell and decay. To build a successful miniature ecosystem, follow this specific order from the bottom up:
- Drainage Layer (1–2 inches): Use pebbles or gravel. This is where excess water drains so it doesn’t drown your roots.
- Activated Charcoal: A thin sprinkle over the pebbles. It absorbs odors and toxins overtime. Don’t skip this—it’s the “liver” of your terrarium.
- Barrier Layer: Use sphagnum moss or a fine mesh which acts as a soil separation layer. This stops the soil from washing down and clogging your drainage.
- Planting Substrate (2–3 inches): Use a moisture-retentive but breathable terrarium soil mix. For open builds, use a gritty succulent or cactus mix that drains quickly. A slight mound in the center looks more natural than a flat layer and creates visual depth in the finished layout.
Why This Layering System Works?
A healthy terrarium environment depends on one thing: moisture control. These layers work together to create that balance.
- The drainage layer keeps roots out of standing water.
- The activated charcoal helps maintain freshness.
- The barrier layer keeps your structure intact.
- The substrate supports healthy root growth.
Once you understand that, the entire DIY terrarium setup becomes much easier to manage.
Where to find these supplies?
Interestingly, Aquariums India has become a secret weapon for terrarium builders. They stock professional-grade activated charcoal, decorative stones and wood, and mosses originally meant for planted tanks—and they ship pan-India.
3. Best Terrarium Plants
Plant choice matters just as much as substrate and layering. The best terrarium plants are the ones that stay compact, tolerate the right humidity level, and won’t outgrow the container too quickly. Here are the “all-stars” for beginners.
Humidity-loving picks for closed terrarium
- Fittonia (Nerve Plant): Famous for its bright pink or white veins. It “faints” when thirsty, telling you exactly when it needs a misting.
- Soleirolia soleirolii (Baby’s Tears): For creating a soft, lush ground cover.
- Callisia repens (creeping inchplant or turtle vine): Adds texture, fills gaps nicely, and stays manageable if trimmed occasionally.
- Moss: The backbone of any forest-style build.
For Open (Arid) Setups:
- Echeveria: Striking, architectural, and very forgiving of neglect. It’s also a classic choice for a succulent terrarium
- Aloe: Small Aloe varieties are hardy, beginner-friendly, and visually strong in minimalist glass arrangements.
- Tillandsia (Air Plants): Unique because they don’t even need soil—just a bright, airy spot and an occasional soak / mist complimented by a sculptural, modern look.
- Small Cacti: Mini cacti also do well in open containers as long as they get enough light and aren’t overwatered.
General Rule for Selecting Plants
| Closed Terrarium | Open Terrarium | |
| Growth | Slow-growth | Sluggish-growth |
| Humidity Tolerance | High | Low |
| Light | Indirect | Stronger / Bright indirect |
| Avoid | Plants that grows aggressively or develops large root systems too quickly | Plants that requires too much water / moisture |
4. Building your first DIY terrarium step by step
Products Needed
- Container
- Pebbles / Gravel
- Activated Charcoal
- Spaghnum Moss / Mesh Fabric
- Terrarium Soil Mix
- Plants
- Water Sprayer
- Optional – Tweezer, Gloves, Cleaning Crew
Setting up the layers in the right order
Start with a clean, transparent, dry glass container. Any clear jar, bowl, or cylindrical vessel with a lid works for a closed setup. For an open terrarium, use a bowl or wide-mouth container with plenty of room for airflow.
Time needed: 59 minutes
Follow the layering process as sequenced below –
- Drainage Layer
Add 1 to 2 inches of pebbles or gravel and spread them evenly to cover the entire base.
- Filtration
Then sprinkle a thin, even layer of activated charcoal over it to absorbs toxic and odor.
- Barrier Layer
Lay your sphagnum moss or mesh fabric flat on top to keep the substrate from mixing downward.
- Substrate Layer
Add 2 to 3 inches of terrarium soil mix, mounded slightly toward the center rather than kept perfectly flat. This gives a natural look and your plants varied depth to root into.
- Planting
Insert the largest plants first, then fill around them with smaller plants, moss, or ground cover. A good beginner rule is –
– tallest plants in the back or center.
– trailing plants near edges.
– moss and low growers as fillers. - Misting
Mist lightly with a spray bottle to settle the soil without soaking it, you want the substrate damp, not soaked. For a closed terrarium, this will be the only watering it needs for quite a while. Seal the lid if it’s a closed build.
- Placement
Place the setup in bright, indirect light and not harsh direct sun.
Wait and Watch
During the first week, monitor the glass and check on the following –
– Light condensation = healthy
– Heavy fogging all day = too much moisture
– No condensation for several days in a closed build = likely too dry
Pro Tip: “Closed” doesn’t mean permanently sealed. If you see heavy, opaque fog, just crack the lid for a few hours to adjust the moisture balance.
The first week tells you almost everything about whether your setup is balanced.. Once condensation settles into a light daily cycle, the water balance is working correctly.
5. Lighting and humidity: what most beginners get wrong
One of the biggest beginner mistakes is assuming all terrarium plants need the same light and humidity conditions. They don’t.
How much light does a terrarium needs?
Most terrarium plants do best in bright, indirect light. Direct sun through glass can:
- Accelerate mold and moisture problems
- Overheat the container
- Burn leaves
- Stress humidity-sensitive plants
A bright spot near a filtered window usually works well. If your room doesn’t get enough natural light, LED grow lights are a very practical solution. In fact, many terrarium owners use the same lighting systems designed for planted aquariums because the light spectrum is already well suited to mosses, tropical foliage, and compact indoor plants.
That’s another area where Aquariums India becomes relevant, since planted tank lighting often overlaps directly with terrarium lighting needs.
How to Manage Terrarium Humidity Without Overthinking It?
A closed terrarium mostly manages its own humidity. Your role is to observe and adjust only when necessary. This is less about strict schedules and more about learning how your terrarium microclimate behaves.
| For a closed setup: | For an open setup: |
|---|---|
| – light daily condensation is normal – constant heavy fogging means too much moisture – no condensation for days means it needs a light mist | – water more lightly but more regularly – allow the top layer of substrate to dry a bit between sessions – avoid letting succulents sit in wet soil |
6. Common Terrarium Problems and How to Fix Them
How to Fix Mold in a Terrarium
A little white fuzz or black spotting usually means too much moisture combined with poor airflow. Follow these simple steps to fix –
- Open the lid for a few hours daily
- Remove affected material carefully
- Dab small spots with diluted hydrogen peroxide using a cotton swab
- Reduce misting
- Make sure the substrate isn’t staying soaked
Most mild terrarium mold issues clear up without needing a full rebuild.
How to Balance Humidity in a Terrarium
If your closed setup stays heavily fogged all day, your humidity balance is off. Follow these simple steps to fix –
- Open the lid temporarily
- Reduce watering
- Move it away from excessive heat or direct light
- Check whether your substrate is waterlogged
A little fog is part of a healthy condensation cycle. Too much means the system is overloaded.
Root Rot in a Terrarium
Root rot is one of the most common terrarium problems and usually happens when roots stay wet for too long. The signs of root rot are –
- Yellowing leaves
- Limp or wilted foliage
- Mushy stems near the base
- Collapsing plant despite moist soil
How to Prevent / Fix Root Rot in Terrarium
- Reduce watering immediately
- Remove severely affected plants
- Trim off damaged roots or stems
- Let cuttings dry briefly before replanting in fresh substrate if needed
Catching root rot early often saves the rest of the setup.
How to Tackle Fungus Gnats and Pests in a Terrarium
Fungus gnats are usually a sign of consistently damp, compacted substrate. Follow these simple steps to tackle fungus gnats / pests –
- Improve airflow
- Reduce excess moisture
- Avoid overwatering
- Remove decaying organic matter
Cleaning Crew
If you want a healthier bioactive terrarium setup, introducing springtails and isopods early can be a smart move. These tiny cleanup insects, aka cleaning crew, help break down decaying leaves, organic matter, and plant waste, which supports a healthier terrarium ecosystem over time.
For most first-time builds, springtails are the easier and safer choice because they stay hidden, reproduce easily, and are especially effective at controlling mold. If you decide to make your terrarium more fully bioactive later, adding a suitable dwarf isopod species can be a natural next step.
7. Final Thoughts: Start Small and Build Your First Terrarium This Weekend
The easiest way to succeed with a terrarium is to stop treating it like a regular houseplant pot. It behaves more like a controlled miniature ecosystem than a standard planter.
A terrarium setup for beginners doesn’t need to be expensive, advanced, or perfect on the first try. Once you understand the basics – drainage layer, activated charcoal, barrier layer, proper substrate, plant compatibility, and moisture control, the entire process becomes surprisingly intuitive.
Start simple:
- one glass container
- a handful of pebbles
- activated charcoal
- sphagnum moss
- one or two forgiving plants like Fittonia or a small Echeveria
That’s enough to build a healthy, beautiful indoor glass garden.
And if you’re already familiar with planted aquariums, you’ll notice the crossover quickly. Many of the same materials used in aquascaping work perfectly in terrariums too, which is why stores like Aquariums India have naturally become useful for sourcing terrarium supplies in India.
Build your first one this weekend. It takes less than an hour, costs very little to get started, and once you watch your terrarium ecosystem settle in over the first few weeks, it becomes very easy to understand why this hobby is so addictive.